此篇仅为个人的学习记录。参考地址:https://blog.csdn.net/weixin_42236466/article/details/107225625
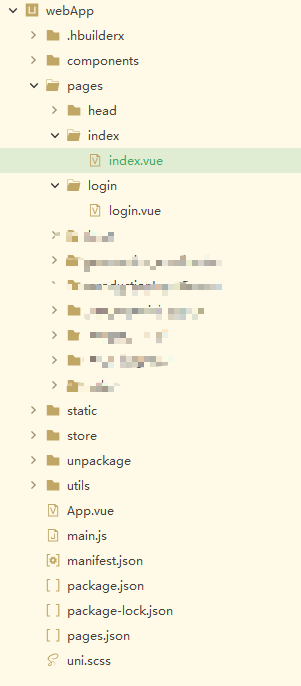
我在uniapp的H5页面使用微信登录需要前后端配合,项目目录结构为:
启动页为:pages/login/login (也就是我项目启动后,直接访问的话会直接访问到login这个页面)
但是我项目的入口不是login,是另一个:index
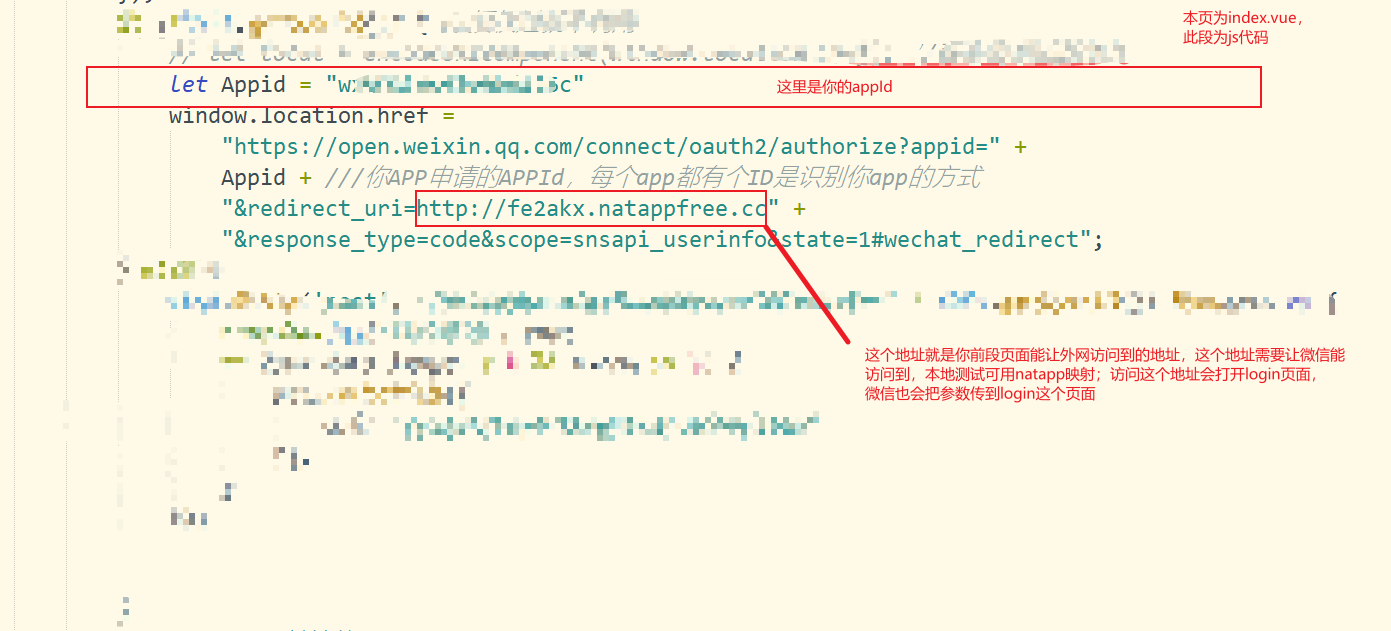
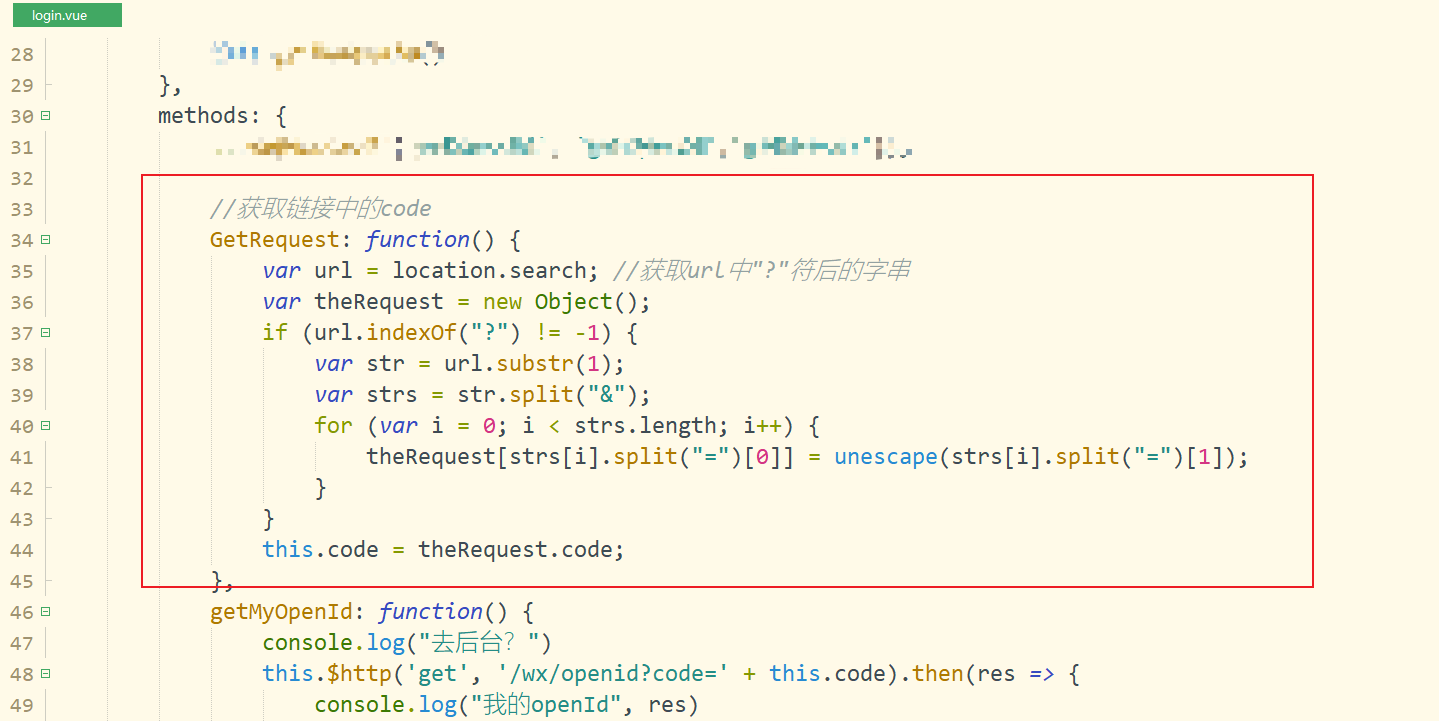
再看login页面:login页面内的js获取微信传过来的code,然后用这个code作为参数去访问我的后台接口
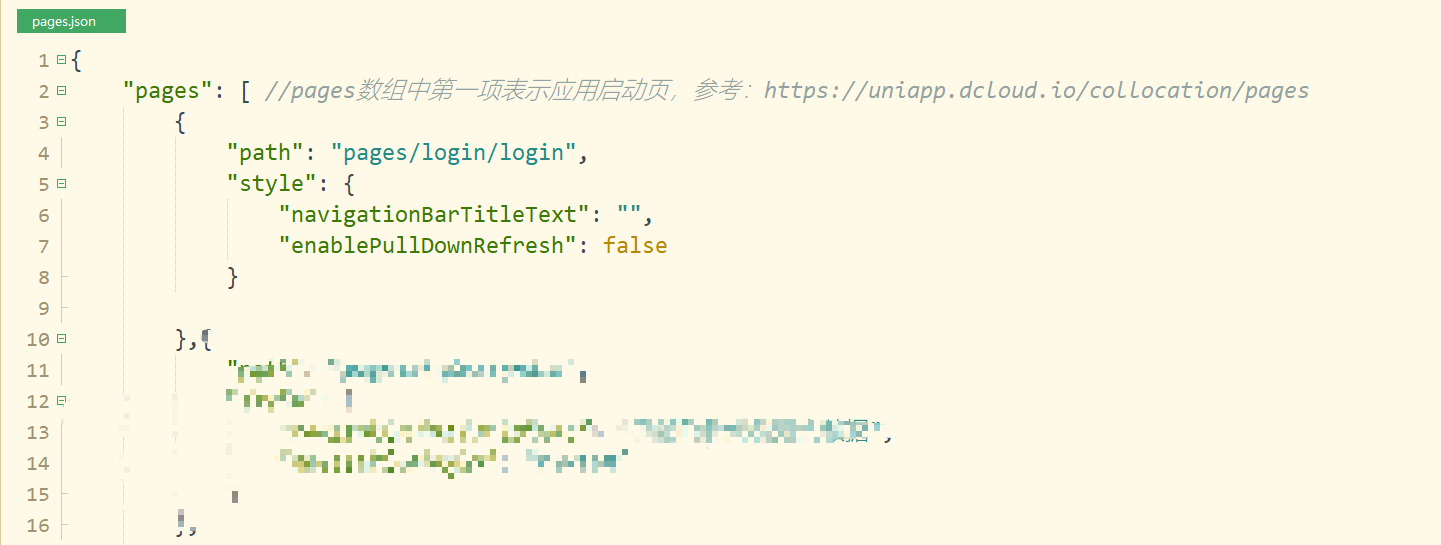
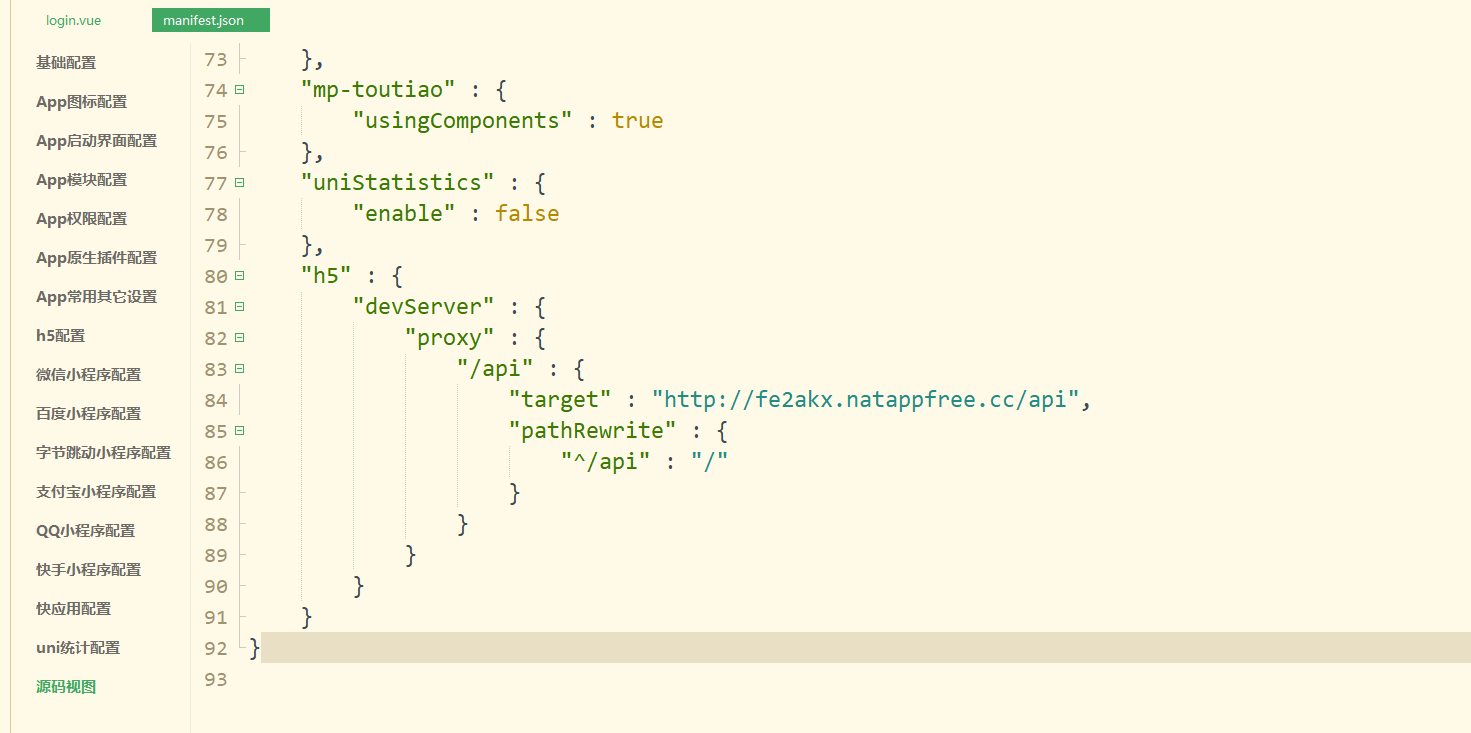
uniapp的manifest.json 源码视图
后端接口(springboot项目): @GetMapping("/openid") @ApiOperation("获取微信用户信息") //以下仅为demo,实际开发中请再做优化 public ResponseBean getOpenId(String code) { System.out.println("2333"); if (code == null) { return ResponseBean.error("code为空"); } String wxAuthPath = "https://api.weixin.qq.com/sns/oauth2/access_token?appid=你的appID&secret=你的appsecret&code=%s&grant_type=authorization_code"; String url = String.format(wxAuthPath, code);//拼接链接 RestTemplate restTemplate = new RestTemplate();//发送请求类 String res = restTemplate.getForObject(url, String.class);// openid access_token JSONObject jsonObject = new JSONObject(res); String openid = jsonObject.getStr("openid"); if (openid == null) { return ResponseBean.error("openid为空"); } String accessToken = jsonObject.getStr("access_token"); String obtainHeadImage = "https://api.weixin.qq.com/sns/userinfo?access_token=%s&openid=%s"; String newUrl = String.format(obtainHeadImage, accessToken, openid); String result = restTemplate.getForObject(newUrl, String.class); result = toUTF8(result); Map map = new HashMap<>(); map.put("openid", openid); map.put("user", result); return ResponseBean.success(map); }
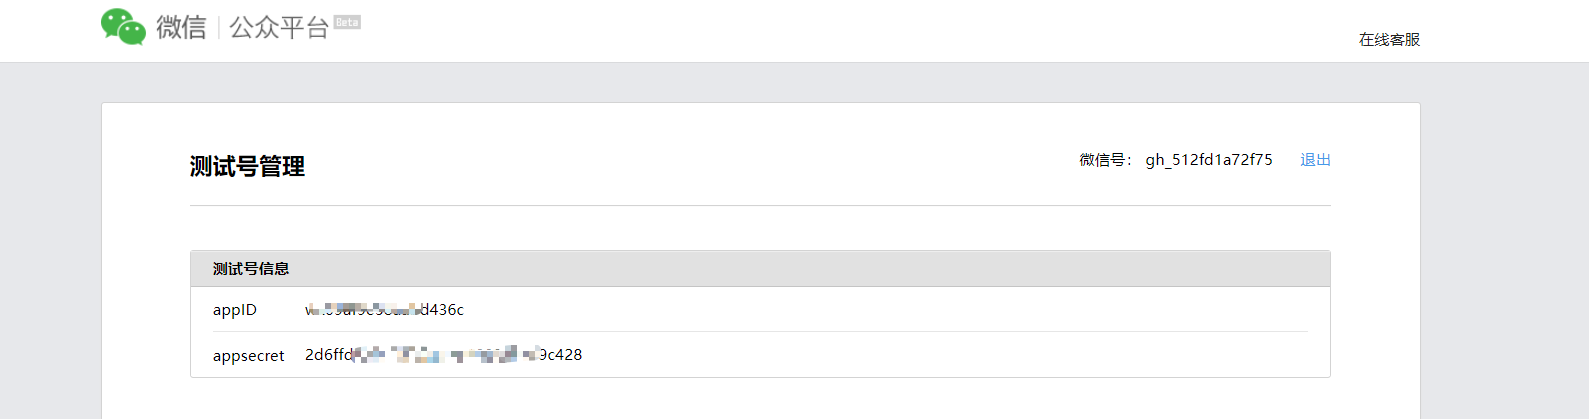
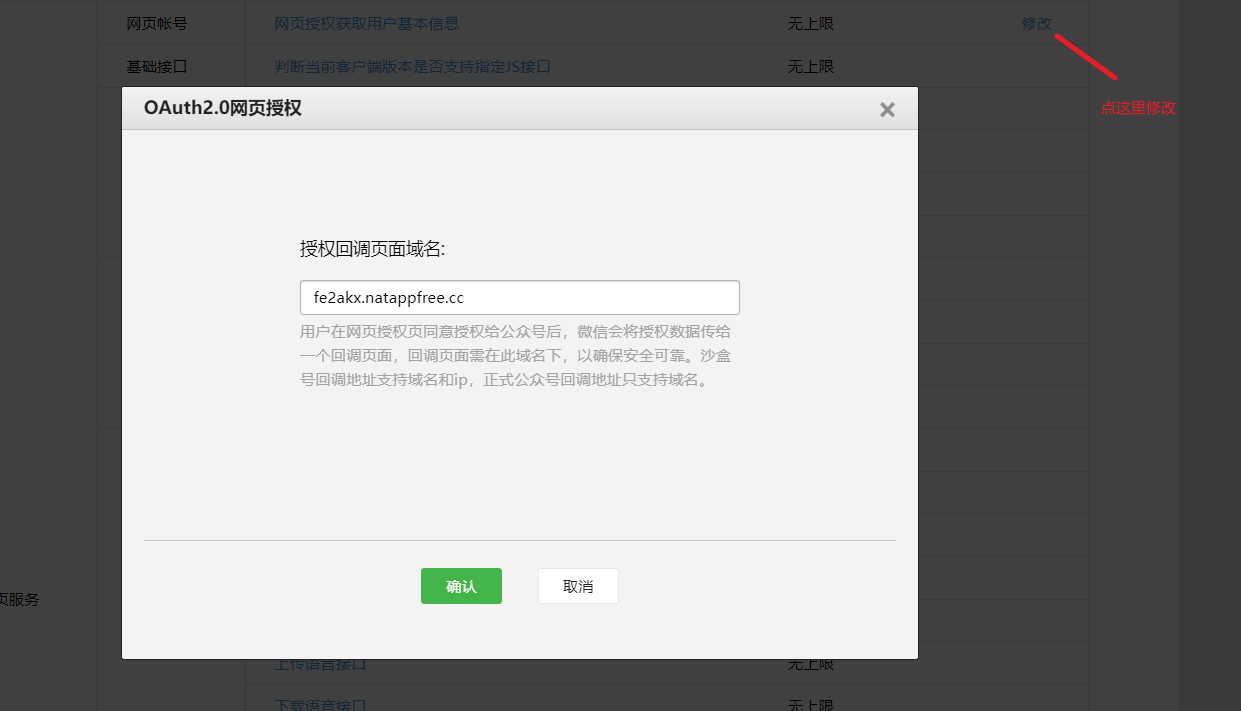
这是我的测试号
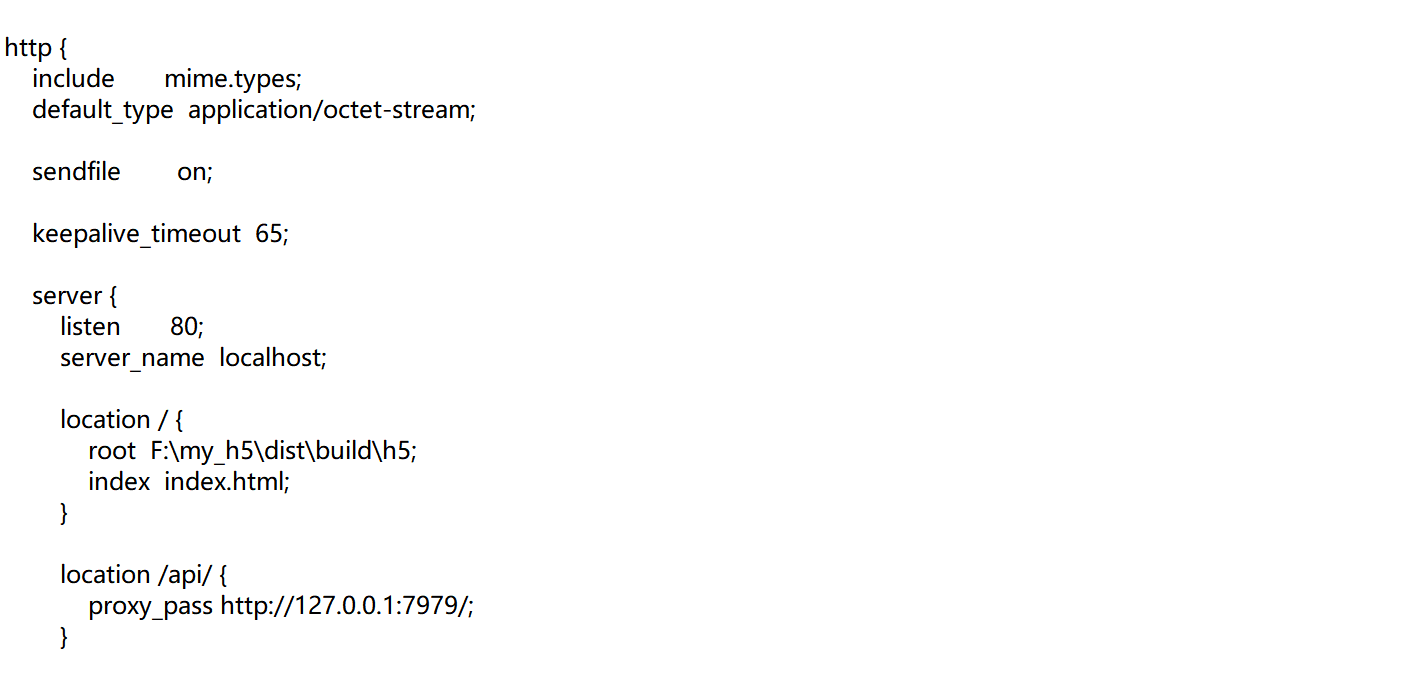
我的nginx配置 (打包的H5 --> nginx的80端口 --> http://fe2akx.natappfree.cc )
(访问 http://fe2akx.natappfree.cc/api 相当于访问127.0.0.1:7979)
所有的配置以及结构就是这样了,可以获取到openId以及用户信息(头像、地区等),也可以直接让微信把code传到你的接口里,不过这样的话又要做websocket,懒得弄了,所以采用了这么麻烦的方式,这也是我第一次做微信的登录,仅做为个人笔记,以上。
流程:打开http://fe2akx.natappfree.cc/#/pages/index/index 跳转至http://fe2akx.natappfree.cc(也就是login页面)再访问wx/openid接口,返回用户信息
免责声明:如果侵犯了您的权益,请联系站长,我们会及时删除侵权内容,谢谢合作! |