针对通讯录页面我们整体上可以分为列表部分跟右边索引条部分,因为索引条是在列表的上面,所以这个页面的 body 部分我们采用 Stack 部件。下面我们可以来按照每个部分来详细介绍下实现思路。列表部分实现列表部分整体我们可以分为顶部 4 个固定的 cell 跟底部的联系人 cell,所以这一块我们定义了两个数据源 _headerData 跟 _listDatas,但是 cell 我们用的是同一个 cell,cell 对应的模型我们用的也是同一个,只是对参数进行的区分,cell 的参数也是一样。但是我们还可以看到,联系人部分相同首字母的头部会有一个索引头,在 iOS 中我们可以用组头视图来实现,但是 Flutter 中没有组的概念,所以我们就在 cell 中来添加这个索引头视图,只是通过逻辑跟参数来判断是否展示索引头视图部分。下面我们看一下关键代码部分的实现。 列表部分Container( color: CahtThemColor, child: ListView.builder(itemBuilder: _itemForRow, itemCount: _headerData.length + _listDatas.length,) ),Widget _itemForRow(BuildContext context, int index) { if (index < _headerData.length) { return _FriendCell(imageAssets: _headerData[index].imageAssets, name: _headerData[index].name); } index = index - _headerData.length; // 判断是否显示组名称 return _FriendCell( imageUrl: _listDatas[index].imageUrl, name: _listDatas[index].name, groupTitle: (index > 0 && _listDatas[index].indexLetter == _listDatas[index -1].indexLetter) ? '' : _listDatas[index].indexLetter); }
列表部分我们用 Container 包了一层,方便后期的改动。_itemForRow 方法部分我们通过判断 index 是否大于 _headerData.length 来传不同的参数对 cell 进行初始化,针对每组相同首字母的 cell 我们通过判断当前模型与下一个模型的索引字符 indexLetter 是否相等来判断是否展示索引头视图。 cell 部分的实现class _FriendCell extends StatelessWidget { _FriendCell({this.imageUrl = '', this.name = '', this.groupTitle = '', this.imageAssets = ''}); final String imageUrl; final String name; final String groupTitle; final String imageAssets; @override Widget build(BuildContext context) { return Column( children: [ groupTitle.length > 0 ? Container( height: 30, color: CahtThemColor, alignment: Alignment.centerLeft, padding: EdgeInsets.only(left: 15), child: groupTitle.length > 0 ? Text(groupTitle, style: TextStyle(color: Colors.grey),) : null, ) : Container(), //组头 Container( color: Colors.white, child: Row( children: [ Container( margin: EdgeInsets.all(10), width: 34, height: 34, decoration: BoxDecoration( borderRadius: BorderRadius.circular(6.0), image: imageUrl.length > 0 ? DecorationImage( image: NetworkImage(imageUrl) ) : DecorationImage( image: AssetImage(imageAssets), ) ), ),//图片 Container( // color: Colors.red, width: screenWidth(context) - 54, child: Column( children: [ Container( alignment: Alignment.centerLeft, height: 54, child: Text( name, style: TextStyle(fontSize: 18), ), ), Container( height: 0.5, color: CahtThemColor, ), //下划线 ], ), ),//昵称 ], ), ), //cell的内容 ], ); }}
如果一个类我们只是想在当前文件中使用可以通过下划线的方式来定义。cell 的整体我们分为上下两部分,组头跟内容部分。所以整体我们使用 Column 部件来实现。 模型部分的实现class Friends { final String imageUrl; final String name; final String indexLetter; final String imageAssets; Friends({this.imageUrl = '', this.name = '', this.indexLetter = '', this.imageAssets = ''});}
索引视图的实现索引视图部分当我们点击的时候颜色会变成黑色透明的,所以整体是有状态的,继承于 StatefulWidget。因为索引条是悬浮在视图的右边居中,所以整体采用 Positioned 部件,整体高度我们这里设置为整个屏幕的二分之一,宽度为 30,距离右边为 0,距离顶部为屏幕的八分之一。 索引视图内容部分for (int i = 0; i < INDEX_WORDS.length; i++) { _words.add( Expanded(child: Text(INDEX_WORDS[i], style: TextStyle(fontSize: 10, color: _textColor),)) ); }
child: Container( color: _bkColor, child: Column( children: _words, ), ),
INDEX_WORDS 数组存放的是索引字符,我们在 build 中方法中遍历数组,把每个字符对应的部件加入到 _words 中。索引条中的部件是上下排列并且等分的,索引每个索引字符对应的部件采用 Expanded,整体采用 Column 部件。
索引条点击改变状态颜色child: GestureDetector( // 索引条点击 onVerticalDragDown: (DragDownDetails details){ setState(() { _bkColor = Color.fromRGBO(1, 1, 1, 0.4); _textColor = Colors.white; }); }, // 索引条点击取消 onVerticalDragEnd: (DragEndDetails details){ setState(() { _bkColor = Color.fromRGBO(1, 1, 1, 0.0); _textColor = Colors.black; }); },
当点击索引条的时候需要改变背景颜色跟文字颜色,索引我们定义了两个变量 _bkColor 跟 _textColor,当索引条被点击跟取消点击的时候调用 setState 方法,并且修改这两个变量的值。 索引条拖拽//获取选中的 item 文字String _getIndex(BuildContext context, Offset globalPosition) { //拿到点击小部件的盒子,也就是索引条 RenderBox box = context.findRenderObject() as RenderBox; // 拿到 y 值, globalToLocal 当前位置距离索引条左上角 (0, 0) 位置的距离 (x, y) double y = box.globalToLocal(globalPosition).dy; //算出字符的高度 var itemHeight = screenHight(context) / 2 / INDEX_WORDS.length; //算出第几个 item int index = (y ~/ itemHeight).clamp(0, INDEX_WORDS.length - 1); return INDEX_WORDS[index];}
onVerticalDragUpdate: (DragUpdateDetails details){ print(_getIndex(context, details.globalPosition)); },
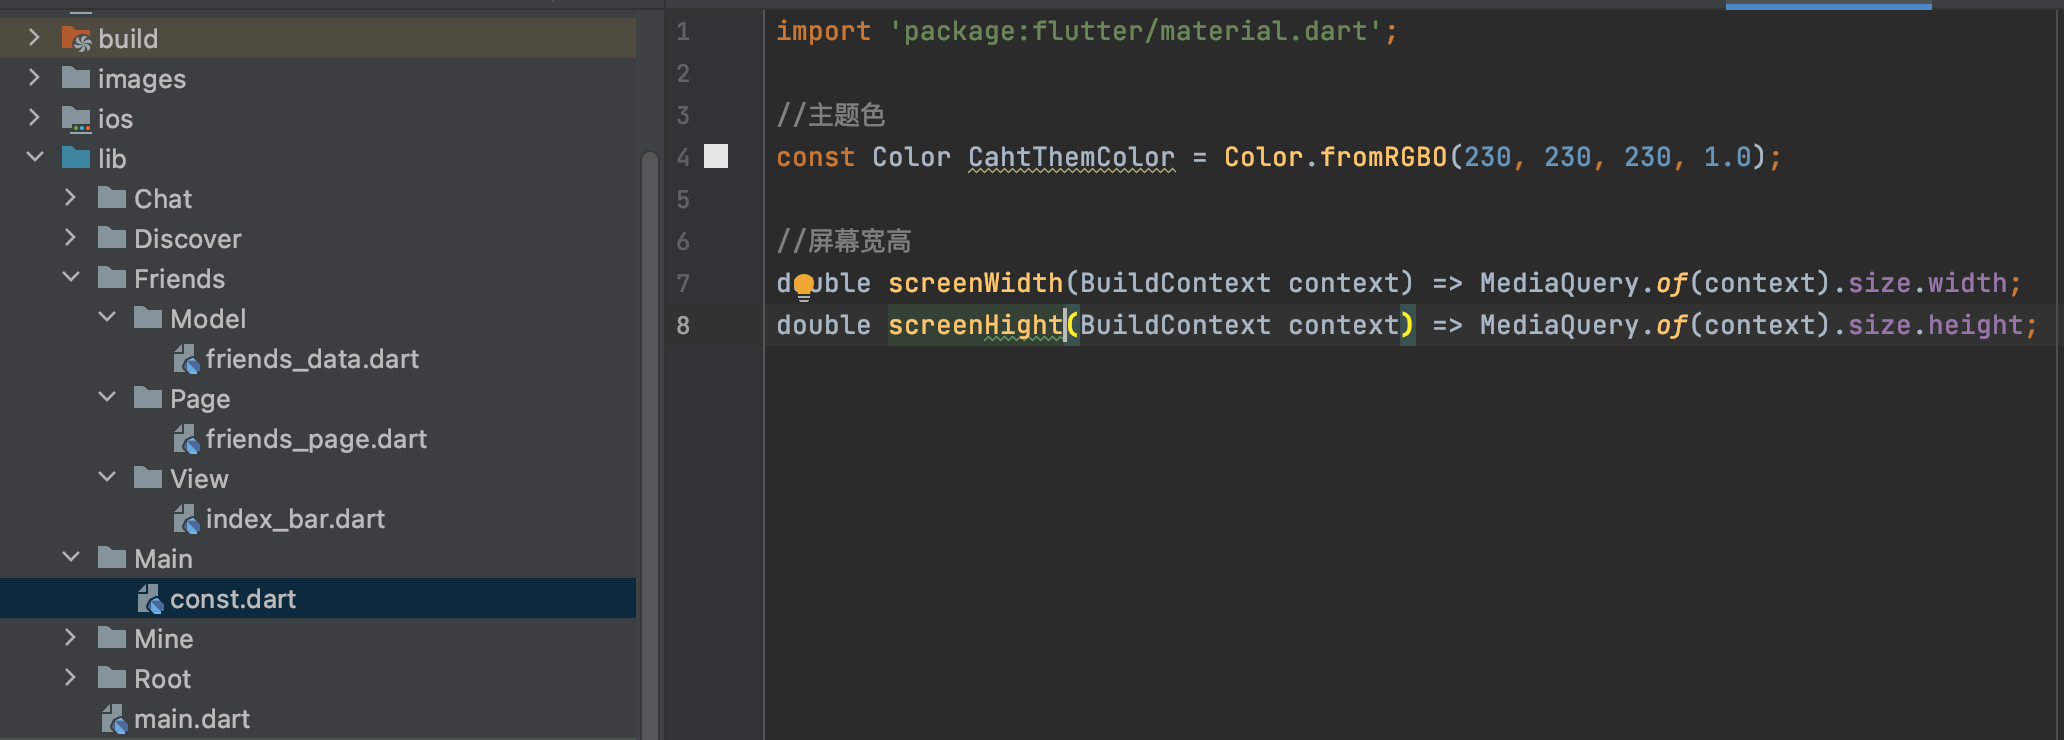
当我们上下拖拽索引条的时候,需要获取到点击位置对应的索引字符,我们通过 context.findRenderObject() as RenderBox 能拿到当前的部件,也就是索引条,然后通过 box.globalToLocal 可以得到当前触摸位置距离索引条左上角 (0, 0) 位置的距离 (x, y),这样就可以得到了 y 值,因为知道了索引条的高度,索引就可以计算出每个索引字符对应部件的高度,就能得到点击了第几个索引,也就能通过 INDEX_WORDS[index] 得到点击的字符。最后需要通过 clamp 对 index 做个取值范围的判断。 全局变量的抽取这里我们定义了一个 const 文件,对全局的变量进程了抽取。
免责声明:如果侵犯了您的权益,请联系站长,我们会及时删除侵权内容,谢谢合作! |