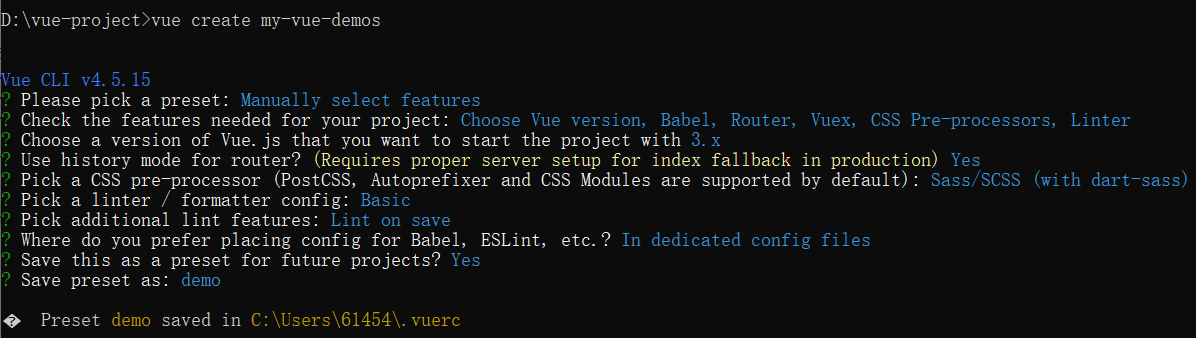
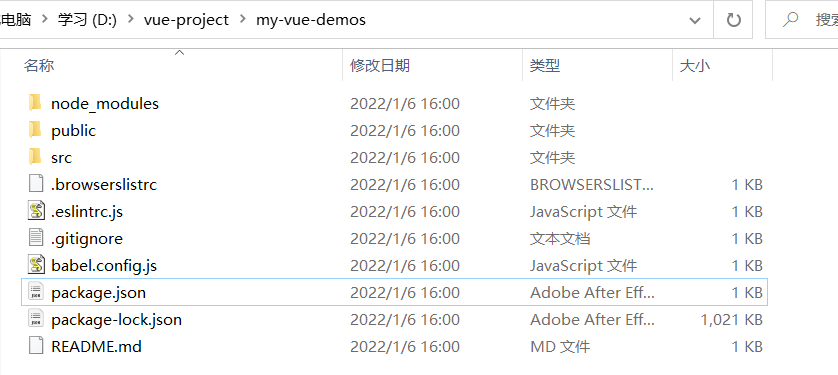
一、开发流程思维导图二、前期准备1、安装Nodejs1)nodejs下载地址,下载并安装2)确认已安装了node.js,可在cmd中输入( node -v和npm -v),如显示出版号,说明安装成功2、搭建Vue项目(vue-cli和vite,2选1)1)搭建第一个vue-cli项目npm install -g @vue/cli //全局安装vue-cli# ORyarn global add @vue/clivue --version //查看版本vue create hello-world //创建一个项目
官方文档:https://cli.vuejs.org/zh/guide/installation.html
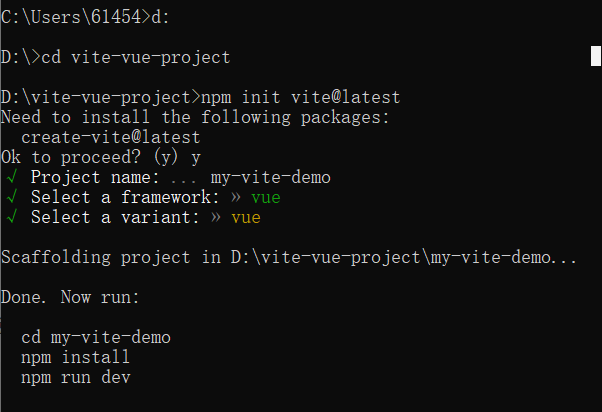
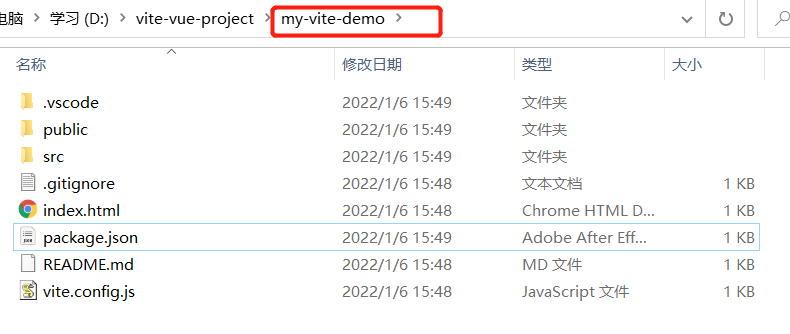
系统默认安装的vue、vue-router、vuex都不是最新版本,需要手动卸载重新安装2)搭建第一个 Vite 项目npm init vite@latest
官方文档:https://cn.vitejs.dev三、启动项目1、vue-clinpm run serve
2、vitenpm install //安装依赖npm run dev //启动项目
四、安装常用的依赖npm install vue@next //最新版vue v3.xnpm install vue-router@4 //最新版vue-router v4.xnpm install vuex@next --save //最新版vuex v4.xnpm install axios //基于promise 的HTTP 库npm install element-plus //基于最新版Vue 3.x的PC端UI框架npm install ant-design-vue --save //基于最新版Vue 3.x的PC端UI框架npm install vant@3 //基于最新版Vue 3.x的移动端UI框架npm install loadsh //JavaScript 的实用工具库npm install immutable //数据处理工具npm install dayjs //时间日期库npm install qrcode //二维码生成器npm install echarts //可视化图表库npm install gsap //动画库npm install xlsx file-saver //导出表格npm install mockjs //生成随机数据,拦截 Ajax 请求npm install eslint --save-dev //可组装的JavaScript和JSX检查工具npm install sass sass-loader //CSS扩展语言npm install vuedraggable //基于Sortable.js实现的vue拖拽插件npm install sortablejs //拖拽库npm install screenfull //实现全屏功能npm install nprogress //加载进度条npm install jszip //创建、读取和编辑 .zip 文件npm install js-cookie //cookie存取npm install fuse.js //模糊搜索npm install dropzone //提供文件拖拽上传并且提供图片预览的开源类库npm install driver.js //页面分步引导npm install core-js //JavaScript标准库的 polyfill(垫片/补丁)npm install codemirror //浏览器实现的多功能文本编辑器npm install clipboard //文本复制到剪贴板
vue v3.x:https://v3.cn.vuejs.org
vue-router v4.x:https://next.router.vuejs.org/zh/installation.html
vuex v4.x:https://next.vuex.vuejs.org/zh/index.html
element-plus:https://element-plus.gitee.io/zh-CN
ant-design-vue:https://next.antdv.com/docs/vue/getting-started-cn
vant:https://youzan.github.io/vant/v3/#/zh-CN
lodash:https://www.lodashjs.com
immutable:https://immutable-js.com
dayjs:https://dayjs.gitee.io/zh-CN
echarts:https://echarts.apache.org/zh/index.html
gsap:https://greensock.com/gsap
mockjs:http://mockjs.com
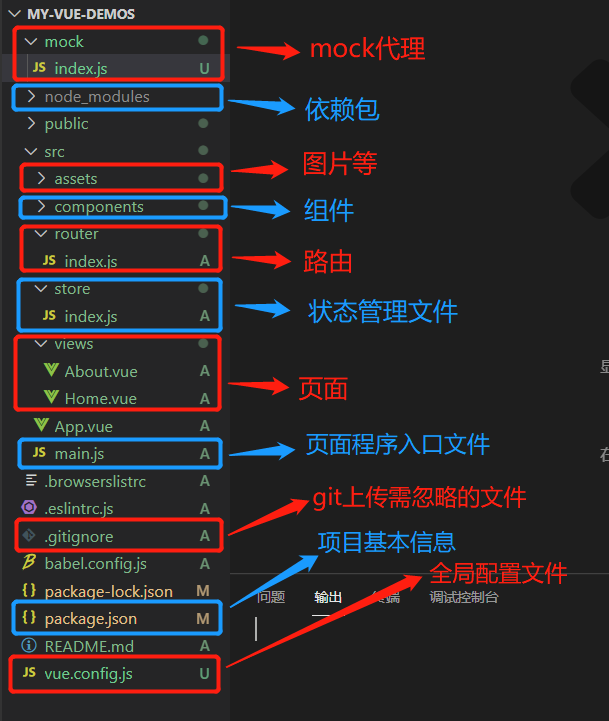
sass:https://www.sass.hk 五、项目目录详解及各文件规范1、前端开发规范文档:https://www.jianshu.com/p/f9900596d50b2、项目目录详解六、项目必备知识1、HTMLHTML5:https://www.runoob.com/html/html5-intro.html 2、JavaScriptES6 入门教程:https://es6.ruanyifeng.com/ 3、CSSFlex布局:https://www.jianshu.com/p/acfbb1b7d0f6 4、VueVue3官方文档:https://v3.cn.vuejs.org/api 七、项目开发1、与设计师对接:PS、蓝湖、PxCode、2345看图王2、代码管理工具git、svn1)git常用命令初始化仓库: git init远程拉取项目:git clone 地址状态:git status添加:git add .提交:git commit -m " "推送:git push查看远程仓库:git remote -v推到master上:git push origin master创建新的分支(分支名:dev):git checkout -b dev新建分支合并到master:git checkout master git marge dev git push origin master删除分支:git branch -D dev远程删除分支:git push origin :dev退回到上一个版本:git reset --hard head^查看日志:git log 或者 git reflog打开Git Bash,配置用户名和邮箱地址,输入命令git config --global user.name "用户名"git config --global user.email "邮箱"
Git教程:https://www.liaoxuefeng.com/wiki/896043488029600 3、开发工具vscode1)安装扩展:Vetur、Volar、Prettier、ESlint2)settings.json配置{ // 使用vscode-icons主题 "workbench.iconTheme": "vscode-icons", // 每次保存的时候将代码按格式进行修复 // "editor.formatOnSave": true, "editor.codeActionsOnSave": { "source.fixAll": true }, "eslint.validate": ["javascript", "javascriptreact", "vue"], "[javascript]": { "editor.defaultFormatter": "esbenp.prettier-vscode" }, "[vue]": { "editor.defaultFormatter": "octref.vetur" }, "[jsonc]": { "editor.defaultFormatter": "esbenp.prettier-vscode" }, "[html]": { "editor.defaultFormatter": "esbenp.prettier-vscode" }, "[css]": { "editor.defaultFormatter": "esbenp.prettier-vscode" }, // 默认使用prettier格式化支持的文件 "vetur.format.defaultFormatter.js": "vscode-typescript", "vetur.format.defaultFormatter.html": "prettyhtml", "vetur.format.defaultFormatterOptions": { "prettier": { // 结尾无分号 "semi": false, // 超过140个字符换行 "printWidth": 140, // 使用单引号 "singleQuote": true, // 无尾随逗号 "trailingComma": "none", // 箭头函数单个参数不加分号 "arrowParens": "avoid" }, "prettyhtml": { "printWidth": 140 } }, // 同上prettier格式化代码 "prettier.semi": false, "prettier.printWidth": 140, "prettier.trailingComma": "none", "prettier.singleQuote": true, "prettier.arrowParens": "avoid", "files.associations": { "*.cjson": "jsonc", "*.wxss": "css", "*.wxs": "javascript" }, // 指定wxml的格式化 "minapp-vscode.wxmlFormatter": "prettyHtml", "minapp-vscode.disableAutoConfig": true, "[json]": { "editor.defaultFormatter": "esbenp.prettier-vscode" }, "editor.suggestSelection": "first", "vsintellicode.modify.editor.suggestSelection": "automaticallyOverrodeDefaultValue", "files.exclude": { "**/.classpath": true, "**/.project": true, "**/.settings": true, "**/.factorypath": true }, "eslint.trace.server": null}
4、vue-router、vuex、axios、mockjs使用1)vue-routerimport { createRouter, createWebHistory } from 'vue-router'import Home from '@/views/Home.vue'const routes = [ { path: '/', name: 'Home', component: Home }, { path: '/about', name: 'About', // route level code-splitting // this generates a separate chunk (about.[hash].js) for this route // which is lazy-loaded when the route is visited. component: () => import(/* webpackChunkName: "about" */ '@/views/About.vue') }, { // 设置404页面 path: '/:catchAll(.*)', name: '404', component: () => import('@/views/404.vue') }]const router = createRouter({ history: createWebHistory(process.env.BASE_URL), routes})export default router
在main.js中引入 import { createApp } from 'vue'import App from './App.vue'import router from '@/router'import store from '@/store'createApp(App).use(store).use(router).mount('#app')
在vue.config.js中添加@对应的映射 'use strict'const port = process.env.port || process.env.npm_config_port || 9527 // dev portconst path = require('path')const name = 'my-vue-demos' // page titlefunction resolve(dir) { return path.join(__dirname, dir)}module.exports = { publicPath: '/', outputDir: 'dist', assetsDir: 'static', lintOnSave: process.env.NODE_ENV === 'development', productionSourceMap: false, devServer: { port: port, open: true, overlay: { warnings: false, errors: true }, // before: require('./mock/mock-server.js') }, configureWebpack: { // provide the app's title in webpack's name field, so that // it can be accessed in index.html to inject the correct title. name: name, resolve: { alias: { '@': resolve('src') } } }}
在vite.config.js中添加@对应的映射 import { defineConfig } from 'vite'import vue from '@vitejs/plugin-vue'import { resolve } from 'path'// https://vitejs.dev/config/export default defineConfig({ plugins: [vue()], resolve: { alias: { '@': resolve(__dirname, "src") //设置别名 } }, server: { host: 'localhost', port: 8080, open: true, },})
vue-router v4.x官方文档:https://next.router.vuejs.org/zh/guide 2)vuex在store文件夹下,创建index.js,并写入 import { createStore } from 'vuex'import user from '@/store/modules/user'export default createStore({ state: { }, mutations: { }, actions: { }, modules: { user }})
在store文件夹下新建modules文件夹,并新建user.js,写入: const state = { count: 0}const mutations = { increment (state) { state.count++ }}const actions = {}export default { namespaced: true, state, mutations, actions,}
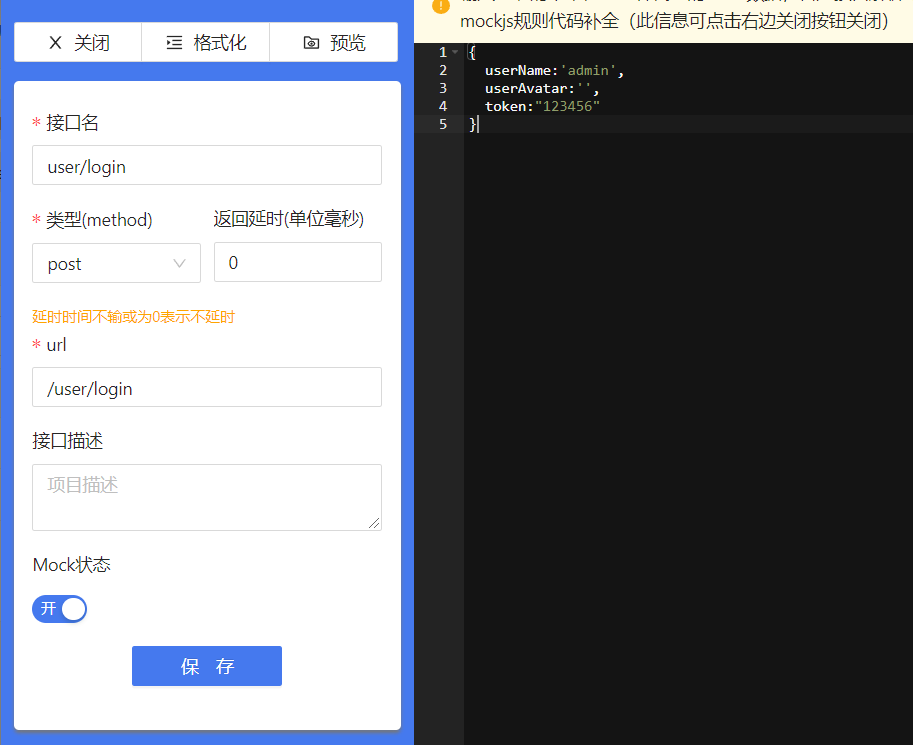
在页面中使用: 3)axiosvue下axios封装:https://www.jianshu.com/p/729d439d3fc0 4)mock方法1、使用fastmock
fastmock:https://fastmock.site/#
mockjs:http://mockjs.com
方法2、封装mockjs
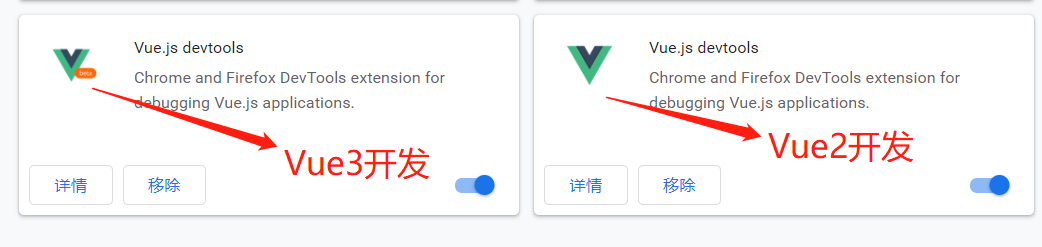
https://panjiachen.gitee.io/vue-element-admin-site/zh/guide/essentials/mock-api.html#mockjs5、Vue.js devtools使用谷歌浏览器扩展中添加Vue.js devtools,方便vue开发调试
6、 改Bug,打断点在 VS Code 中调试:https://cn.vuejs.org/v2/cookbook/debugging-in-vscode.html 7、打包上线部署npm run build
免责声明:如果侵犯了您的权益,请联系站长,我们会及时删除侵权内容,谢谢合作!
|